
To see if this custom-fit item will work for you please tell us what vehicle you'll use it with.
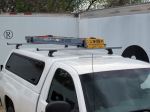
These heavy-duty, aluminum crossbars work with Rhino-Rack legs to create a sturdy roof rack. The square bars include built-in C-channels for mounting Rhino-Rack heavy-duty, contractor-grade accessories.
Features:
Rhino-Rack HD Crossbars - Silver - Qty 2:Videos are provided as a guide only. Refer to manufacturer installation instructions and specs for complete information.
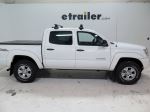
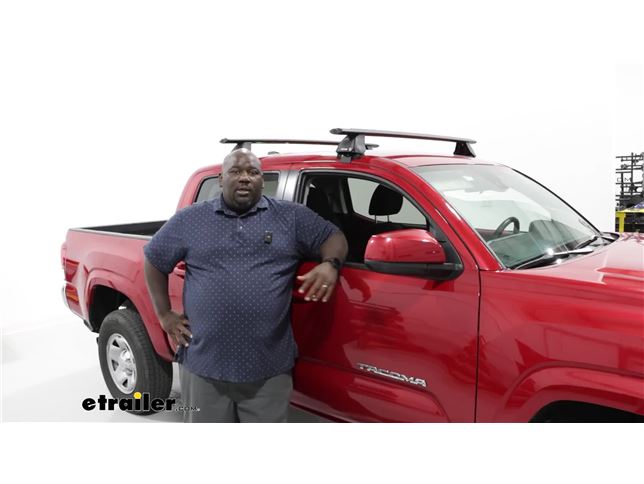
How's it going neighbors This is Ed here with etrailer.com, and we're taking a look at the Rhino Rack Crossbars, on our 2023 Toyota Tacoma double cab. Let's check it out. If you're looking at crossbars, one of the main benefits that you're gonna get out of this, it's gonna be able to increase your capacity for the cargo you can transport. Even though you're in a pickup, you have a bed, and you have the double cab model, as far as cargo space, it is kind of still limited, 'cause it's not a super huge vehicle. So you can make use of the space on top of your vehicle in order to transport more bigger, bulkier items that you may not need access to. So, just a little bit closer look at our crossbars.
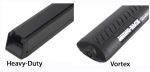
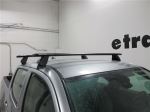
They are aerodynamic, so these are gonna be the aero shape. Basically what that is, it's similar to a wing, where it's gonna cut through the wind a lot easier to help reduce wind noise. Working along with our vortex strips, you can kind of see there's gaps in here, but the strips that you're gonna receive with yours are gonna allow you to either fill out those channels entirely, or customize it if you're using the C channel. That's gonna actually fit up to three eighths inch for your channel, and you just use your lock to unlock, to remove your caps and run it through. So let's take some measurements to see how much we're adding to the height.
And looks like we're coming to, we're adding about, three and three quarter inch to the height. And overall, the width of your bars are gonna be, sorry, your width is three inches, height is gonna be right at an inch and a quarter. So it's gonna work with just about every cargo carrier box, roof platform, kayak carrier, just about any rooftop accessory. So that'll work fine. In general, super sturdy.
You see I'm moving the entire vehicle just from the system that's on the truck right now. So super solid. Everything for your installation is included in the kit except a tape measure. So find your tape measure and we'll get this guy thrown on your Tacoma. Now I laid out everything for our installation in front of me.
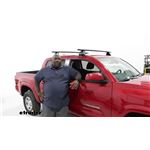
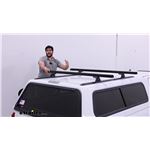
When I do installations at home, I usually like to put everything in front and I can kind of see how it goes together so I know the path that I'm going down. So I just laid out our foot pad, our foot plate, our foot, our clamp, and our foot cover with lock. That will all be secured together using the included screw and tightened down with the Rhino Rack torque wrench that comes along with it. It's a Allen key but it's kind of a cool feature when you get to the torque specification, this curve, this curve right here on the handle actually goes flat so you don't have to worry about over torquing your bolts here. And essentially once you have this foot assembly put together, this flat nut here is gonna slide into the under part of our crossbar and we just, now that's gonna require us to get a couple measurements as far as where that assembly is gonna come together off of the vehicle. But I'd like to put it together ahead of time. You take your Rhino Rack included plastic key for your end cap. You're gonna unlock this guy 'cause this is where your foot is going to assemble. So we're gonna start with our pad. We're gonna take note of our foot plate. It has an arrow showing you the orientation. So this is gonna point on towards the inside of the setup for our foot. And then we're gonna take these two points here and connect it to the two points at the bottom of your foot (objects clicking) and it's gonna snap right on. And then lastly, we're gonna take our hook (hook snapping) and I'm just gonna hand thread the bolt in to hold our clamp in place. And from there, since my arrows was pointing this way, I'm gonna slide it along our track (rack clattering) and just kind of get it in position and I'll do the same on both sides and then we're gonna get some measurements off of the vehicle. So let's get our measurement. Based on the manufacturer's manual, it specifies as far as what size, I mean which type of Tacoma you have as far as where your measurement's gonna be. This one in this case is a little bit over 13 inches as far as the point where the middle of your B column to the center of the door jamb. As far as where your measurement is, again, will be in the manual. So this one's gonna be a little bit over 13 inches. So this is gonna be the spot where we're gonna install our front crossbar. So after we reinstall our end caps, we're gonna set the positioning of our feet. You're gonna have all the dimensions and measurements in the instruction manual that's specific to your vehicle. It comes up to about six and a half inches here. And that's where we're gonna position our foot and then use our final rack tool to tighten it down. And as you see, I hit the specified torque by the indicator on the handle of the torque wrench going flat. I'm gonna do the same on the other side. And we'll we're gonna, with our driver's side open, we're going to stretch over and rest one side, get our passenger door open and come to the other. Now your pads should sit flush on that angle right above your door. And then we're gonna get these clamps tightened down using our Rhino Rack torque wrench. One thing to keep in mind also you want to, before you tighten down, grab your tape measure, make sure you have that measurement spacing here 'cause this is going to, the measurement of the center of your front is gonna determine the placement of your rear bar. So let's get that done. Alright, so I'm just gonna use my tool here and just tighten down on the central bolt for our clamp. This is a specialty tool. It has a kind of a little notch in the middle of your Allen key head so you wouldn't be able to use any type of Allen key. So you definitely want to use your Rhino Rack. And when I get the handle bending flat, I'm at the specified torque and you want to take note on the inside of your pad that it is holding flush and there's no angle to it. You're gonna see that your footpad is down and your clamp is secure in the door jamb. And don't worry about any damage 'cause it's padded and as far as the outside of it, the seal for your door is gonna wrap around it. So you shouldn't get any inside noise either. So lemme get the other side and we'll get measurements for the rear bar. So now that we have our front bar secured, we're gonna get the center measurement from here and go back to the suggested measurement from the manufacturer and install our rear cross bar right here, right at a little bit under 31 inches. Now that we have our measurement, just like with the front, we're gonna kind of hang it over to the other side of our vehicle. Being cautious of our finish, we're just gonna let our hooks come right into our door jamb. Might just give us a little finger tightening just to hold it in place. And now we're gonna grab our tape measure and make sure we're lined up to the correct center measurement. So let's see here. (tape measure rattling) We need to scoot up a little bit and we're gonna scoot that into position and then tighten it down. (tools clattering) All right, and make sure you follow the same steps on the driver's side. I'm gonna grab my tool and we'll get it tightened down. Alright, and our last step before rolling out is gonna be installing our locking cover. There's two tabs here that you're gonna put into the slots. Press 'em down and use your key to lock everything in place. There we are, nice and secure. Now as far as on your end caps, they come with a plastic lock, but they can be swapped out to a cord lock core if you have something along your T tracks that you'd like to keep more secure. So overall, pretty simple install. Another thing that I'm not doing in my installation, because it's a demonstration, there are stickers where you can actually, that say left front, right front where you can label your feet for when you take it off. So you don't have to, so you'll know what goes where. 'Cause you only at this point need to untighten that center bolt and you'll be able to just take your your crossbars off. 'Cause now you have it measured and fitted to your vehicle. So this has been a look at the Rhino Rack Crossbars on a 2023 Toyota Tacoma. Have a great day.
Average Customer Rating: 4.6 out of 5 stars (102 Customer Reviews)
These heavy-duty, aluminum crossbars work with Rhino-Rack legs to create a sturdy roof rack. The square bars include built-in C-channels for mounting Rhino-Rack heavy-duty, contractor-grade accessories.Not too hard of an install and it looks great! Highly recommend for a basic utility roof rack for your 23 Tacoma.
I liked doing business with you. I like the products I ordered. I did have trouble with part of the shipping. It was not your fault, but the part of the shipping you used The USPS did not work. I neverrnecieved the item from them and you had to ship me another via UPS. Over the last 10 years I have had a number of problems with the USPS with packages and mail. They are especially difficult to get information from when something seems to be lost. I would recommend not using the USPS for your shipping needs. Again, I am very happy with you and the products I bought from you.
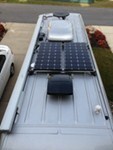
These are the perfect racks for a low profile mounting of solar panels on my Sprinter van.

The rack fit well and was easy to install. Seems to be made well. The problem is the amount of road noise. I never even put the basket on. It was so loud, it roared. I repositioned it several times but the noise was way too much and I finally just removed it. I spent a lot of money for the rack and the basket and now they are in storage. I wish it would have worked out better because I thought it looked really good.
This works great. Very strong and reliable. Holds my ladders with ease. I’ve had it loaded down and done 80mph on the highway no problem.
Bought these for our 2022 Toyota Tacoma, and we haven't had any issues since we installed them in 2022. They look great and don't interfere with the seal when the door closes.
Ordered a Rhino Rack for my 2014 GMC Sierra 2500HD Denali. Rack arrived in very good shape and all items were there. Installing at this time and see no problems ahead.
Great timely delivery! Products all look solid!
LEGS GOING TO AERO BARS ARE STILL LOOKING GOOD AFTER 1 YEAR.
Good quality and locks are included. The plastic lock covers are flimsy but they will keep an honest person honest.
Great product with minimal noise/vibration
No problem carrying a 13 ft kayak and salt water fishing rods
Very pleased and would recommend!
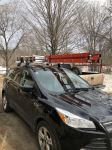
This kit fit my existing Rhino 2500 rack system and allowed me to move the rack from my Ford Escape to my Toyota Tacoma.
And outstanding rack for the value half the price of other major brands, but definitely just as good, and I’ve owned quite a few roof rack systems over the years!
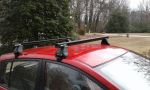
I got the roof rack mounted anyways. Better pics to come when it's all finished!
Hudge disappointment. The way Rhino pre assembles the legs allows the nuts, washers and bolts to come loose during shipping. I was missing several pieces upon arrival because they feel out of the box. I called Etrailer about this and they were very pleasant over the phone and said they would ship the missing hardware to me Monday. After a week of waiting, I called back and they said they didn't know when they could ship the hardware because of back orders. I wish they would have notified me about this earlier because it has effected our big Maine trip and now we can't take the kayaks. They have left me no time to make a plan B unless I just buy another rack from a box store.
This kit is easy to slap on and sturdy enough to balance my skis and snowboards. I recently used the Rhino Rack on a three hour drive to a ski resort and had no issues.
I carefully followed the instructions and didn’t have any issues. I drove from Amelia Island Florida to Upstate NY with a standup paddle board on the roof with no problems. The rack was very stable.
The products are of high quality, look great, function great and is easy to install.
I haven’t even installed the roof rack yet, I wanted to get on here and give you guys major kudos. Mariah was amazingly helpful Going through all three part numbers that made up my kit and indicating potential lead times prior to ordering. She was friendly and just made the whole experience a nice one. The items shipped the next day when I wasn’t expecting them to ship for at least a week. Highly recommend these great folks! Keep it up, this is the type of stuff that keeps America great in my opinion.
I purchased this because I needed 11" brackets and I only needed two to add to my existing setup. Other manufacturers (I could only find one) only sold packs of four at a ridiculously high price. My Rhino Rack mounts and bar arrived within a few days of my order and appear very sturdy and well made. I bought them to add a third support for an awning and a solar shower on the roof of my van. I think I found the perfect solution.
This rack works perfectly on my Nissan Versa for carrying my two Perception Sound 9'6" kayaks. The Rhino-Racks look good to me. The kayaks can rest directly on the rubber pads on the rails, unlike the Yakama racks I had in the past that had bare pipe rails. Also, I expect I can buy parts to adapt this product to a different car without having to buy new towers. I am sorry there are not hooks or loops to attach bungees when carrying lumber. They are noisy in the wind, but less so when carrying the kayaks.
This is my second Rhino-Rack. They go on very easily and hold the bikes/kayaks and even an extension ladder very well....thanks for a great product
I don't use the roof racks often but they work well when I do
I love the racks. The only thing I'm concerned is the the measurement for the front rack. It's sitting about 2/3 on the metal part of the roof of the cab with instruction measurement of 165 mm. So far it working alright or should i make adjustment for a flush fit. Photos will show.
The quality of material was excellent. The instructions were perfect and I had no problems with the installation. Will be trying them out with my canoe on a camping trip this weekend and don't expect any problems.


Do you have a question about this Roof Rack?
Info for this part was:
At etrailer.com we provide the best information available about the products we sell. We take the quality of our information seriously so that you can get the right part the first time. Let us know if anything is missing or if you have any questions.


Thank you! Your comment has been submitted successfully. You should be able to view your question/comment here within a few days.
Error submitting comment. Please try again momentarily.